 MASSIV
GZCLP Progression: T1, T2 and T3 Rules

GZCLP is Cody Lefever's linear-progression program for beginner and novice lifters. Every session combines a heavy T1 lift, a higher-rep T2 lift and T3 accessories. Complete the prescribed work and add weight the next time that lift appears; miss it and move that lift to its next rep scheme. The four workouts can be rotated across three or four training days per week.
What is GZCLP? The tier system
GZCLP stands for the GZCL Linear Progression. The name "GZCL" is just Cody Lefever's Reddit handle. The whole method is organized around three tiers of effort that appear in every workout:
- T1 — the main lift: a heavy compound (squat, bench, deadlift, or overhead press) done for low reps near your top weight. This is where strength is built.
- T2 — the secondary lift: a second compound at a moderate weight for higher reps. This adds volume and trains the lift pattern that wasn't your T1 that day.
- T3 — accessory work: isolation or bodyweight movements (lat pulldowns, rows, curls) for high reps, taken close to failure.
It is built for beginner and novice lifters who can practice the main barbell lifts consistently. It can be a first structured strength program or a more varied alternative after a simple 5×5. The broader GZCL method is a framework with several programs; GZCLP is its linear-progression entry point, not a synonym for every GZCL program.
How GZCLP works, step by step
1. The rep schemes per tier
Each tier has a fixed starting scheme:
| Tier | Scheme | Note |
|---|---|---|
| T1 | 5×3+ | 5 sets of 3; the last set is AMRAP (as many reps as possible) |
| T2 | 3×10 | 3 sets of 10 at a lighter weight than your T1 |
| T3 | 3×15+ | 3 sets of 15; last set AMRAP, push toward 25+ reps |
The "+" on the last set of T1 and T3 matters: those AMRAP sets are extra volume and a built-in test of whether the weight is still right.
2. Set conservative starting weights
Use conservative loads. The current Cody-partnered implementation starts T1 work at about 85% of a tested 5-rep max. If you do not know that number, test it with sound technique or estimate low rather than turning the first week into a max-out. T2 work must be lighter because it begins with sets of 10; use the prescribed load in your template or a weight you can complete cleanly with room to progress.
3. Progress every session you complete
When you hit all prescribed reps, add weight the next time that lift appears — generally 5 lb / 2.5 kg for upper-body lifts (bench and overhead press) and 10 lb / 5 kg for lower-body lifts (squat and deadlift). Keep the lift in its current scheme after a successful session: if you completed 6×2, add weight and stay at 6×2 until that scheme fails.
4. The failure cascade — what to do when you miss
This is the part that makes GZCLP smarter than 5×5. You don't just deload the moment you fail; you switch to a denser rep scheme first:
- T1: fail 5×3 → use the same weight for 6×2. Complete it, then add weight while staying at 6×2. Fail 6×2 → use the same weight for 10×1 and continue adding weight after successful sessions. Fail 10×1 → rest, test a new 5-rep max and restart 5×3 at about 85% of it.
- T2: fail 3×10 → use the same weight for 3×8; fail that → 3×6. After failing 3×6, restart 3×10 at a load slightly above where the previous 3×10 run began.
- T3: add the smallest increment when the last AMRAP set reaches 25 reps. If you cannot complete 3×15, reduce the load about 10–15% and try again.
Stepping 5×3 → 6×2 → 10×1 lowers the required total reps as the load rises. Each lift moves through the stages independently, so your squat can be at 6×2 while your bench remains at 5×3.
Common mistakes
Starting too heavy. The single biggest one. Begin near a 5-rep weight, not your max — the program is designed to start easy and stay productive for a long time.
Resetting instead of switching schemes. Missing 5×3 doesn't mean reset; it means go to 6×2. Lifters who skip the cascade throw away the program's best feature.
Sandbagging the AMRAP sets. Stopping the T1 and T3 last sets at the minimum leaves volume — and your progression signal on T3 — on the table.
Ego on T2. T2 is sets of ten. If you load it like a T1, the tens collapse and you stall a lift that should have months left in it.
Skipping the rotation. GZCLP only balances out if you run all four workouts. Cherry-picking squat and bench days leaves your deadlift and press behind.
How to run it in practice
GZCLP runs as four workouts you rotate through, training 3–4 days a week:
| Day | T1 (5×3+) | T2 (3×10) | T3 (3×15+) |
|---|---|---|---|
| A1 | Squat | Bench | Lat pulldown |
| B1 | Overhead press | Deadlift | Dumbbell row |
| A2 | Bench | Squat | Lat pulldown |
| B2 | Deadlift | Overhead press | Dumbbell row |
If you train three days a week, just run the workouts in order across the week regardless of the calendar: A1 / B1 / A2 one week, then B2 / A1 / B1 the next, and so on. Four days a week is simply A1 / B1 / A2 / B2 every week. The pattern is the same; you're rotating the four templates continuously.
Each session you only need to know three things: the weight for each lift, the current rep scheme for T1 and T2 (in case you've dropped to 6×2 or 3×8), and whether your last AMRAP cleared the bar to add weight. That bookkeeping — per lift, per tier, across a rotating four-day cycle — is exactly where a notebook gets messy.
Picking your starting weights
Start light enough that the early weeks feel almost too easy — that is useful runway. For T1, use about 85% of a sound 5-rep max. For T2, follow the template's prescribed load or choose a conservative weight you can complete for all three sets of 10. If you are unsure, start lighter; GZCLP rewards a long climb more than a heavy start that stalls immediately.
What the first two weeks look like
Running three days a week, your first week is A1 / B1 / A2, and the second week picks up at B2 / A1 / B1. Squat, for example, is a T1 on A1 and a T2 on A2 — so in a single week it gets both heavy triples and a volume set of tens:
| Day | Squat | Bench |
|---|---|---|
| A1 | T1 — 5×3+ (heavy) | T2 — 3×10 |
| A2 | T2 — 3×10 | T1 — 5×3+ (heavy) |
Each time you complete a lift's prescription, it goes up next time it appears. Because most lifts surface roughly twice a week, the early progress is fast — which is exactly why starting light pays off.
Choosing your T3 accessories
T3 is the least prescriptive tier — it's where you patch weak points and add the pulling volume the barbell lifts skip. Good defaults: a vertical pull (lat pulldown or chin-ups) and a horizontal pull (dumbbell or cable row), since the T1/T2 lifts are press- and squat-heavy. Add direct arm or core work if you have time. Run T3 at 3×15+, push the last set hard, and bump the weight whenever that AMRAP set clears about 25 reps.

How long to run GZCLP
Do not stop only because a 12-week calendar ends. Twelve weeks is the length of one current app implementation, not a universal limit built into the progression. Continue while the reset cycles produce new bests with recoverable training. Consider an intermediate program with a longer planning horizon, such as 5/3/1, when several lifts repeatedly move through 5×3, 6×2 and 10×1, reset, and still fail to exceed their previous cycle despite adequate sleep, nutrition and technique.
How Massiv handles this for you
GZCLP is simple in theory and fiddly in practice: four rotating workouts, three tiers with separate progression rules, and a failure cascade (5×3 → 6×2 → 10×1) you have to track per lift. Massiv ships GZCLP as a built-in program and runs all of it — it serves the right workout in the rotation, shows each tier's current scheme and weight, advances you when you complete a session, and automatically steps you down the cascade and resets when you miss. You just lift and log; the app keeps the tiers and rotation straight.
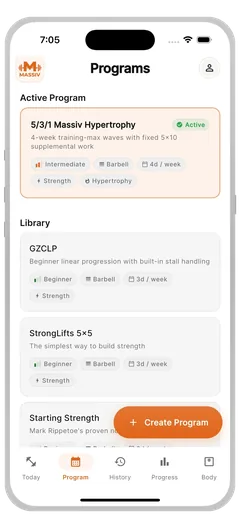
Massiv runs the progression math for this program automatically. Download Massiv and put it to work in the gym.
Download Massiv →GZCLP works because it refuses to let a single missed set end your progress: heavy T1 work, volume on T2, accessories on T3, and a cascade that wrings every last jump out of each weight. Start light, run all four workouts, and trust the rep-scheme drops instead of resetting early — and it'll carry you well past where a plain 5×5 quits.